I’m thrilled to introduce Jamie Lynn, a talented mixed media artist with a passion for visual journaling. With a lifetime of experience in art and craftsmanship, Jamie Lynn embodies the belief that creativity should be a source of joy and self-discovery. Her philosophy is simple yet profound: “Laughter is good, and perfection is imaginary.” Through her work, Jamie Lynn encourages us to embrace the imperfections, find happiness in the process, and create art that speaks to our inner selves. We’re excited to have her share her insights and journey with our products! But know let’s see what Jamie tells us.

For this journal I used the Vintage Love digital kit you can find here, corrugate, cracker box, glue stick, distress ink; card stock; old ledger paper, wet glue.
Covers: Cut the corrugate to size, 5 ¾” x 5 ¾” for the front and back covers.
Cut desired paper to 5 ¾” x 5 ¾” you will need a total of 4 pieces, outside front and back, inside front and back
Spine Piece: Cut the spine piece from cracker box 5 ¾” x 2”, score at ½” and 1 ½” fold and burnish lightly, if desired paint the printed side to coordinate with your paper choice
Accordion fold: Cut cardstock to 5 ¾” x 6” score every half inch, accordion fold. You should have 5 mountains, and the side tabs should be facing the same direction
I find it helpful to mark the inside front & inside back of the cover pieces with a stickie, so I’m less likely to get mixed up.
For the inside pages (signature), you will need to cut 10 pieces of paper of your choice to 5 ½” x 5 ½”


For the front outside cover choose where you want to destress the corrugate. Use a pokey tool to remove some of the outer paper, revealing the inner corrugate texture. Taking the designer paper estimate where the destress portion will be and poke a hole so you can gently remove some paper to make a window, that will reveal the corrugate. Use glue stick to smear the glue across the surface of the corrugate cover, Except on the distressed portion(s). Lay your paper on the cover and burnish. Gently tear and remove any further bits of designer paper until you are satisfied with the reveal. Cover the inside front, inside back and outside back covers, be sure to burnish. Use a wet glue to adhere any loose edges as may be needed. If you like to ink, now is a good time. Using an ink of your choice ink all edges including around the reveal on the outside front cover.
Photo 1
Signature: take the accordion folded card stock, with the 5 mountains pointing up, add a line of glue to the first side of the first mountain, line your paper up to it leaving a very small gap near the valley fold. On the back of the same mountain add a line of glue, match up the edges with the first sheet you have glued on. Do this for each page on each side of the remaining mountains. Once all your pages are glued, determine if you want top loading pockets or side loading pockets or both. Glue the papers to make the pocket with the mountain fold sandwiched in the middle. Along the edge of the page (the opening for your pocket) mark for the center (or eyeball it) and add a thumb notch, if desired. Proceed for each of the remaining pockets.
Photo 2 and Photo 3
Take the flat tab of the accordion and line it up with the inside back cover, You, want to center it so that there is a bit of reveal on the 3 open sides, add glue and affix the tab to the back cover. Doing your best to keep it centered. Photo 4
Take the flat tab of the accordion and line it up with the inside front cover, again you want to center it so that there is a bit of reveal on the open 3 sides; add glue and affix the tab to the front inside cover. You also want to be sure both the front and back covers are lined up the same. The signature should now be between the covers, but the spine is still loose and somewhat flexible.
Take the cracker box spine piece, with the signature all nice and accordion folded, line up the piece with the signature, so that the cover fits into the spine piece. Starting the back outside cover, add glue to the folded portion of the spine piece edge and stick it in place, you will need to burnish and hold in place till the glue sits a bit; repeat for the front cover. Do not glue the valleys to the spine piece. We want them to remain flexible, at least until you have completed decorating the inside of your journal.
Photos 5, 6, 7 and 8
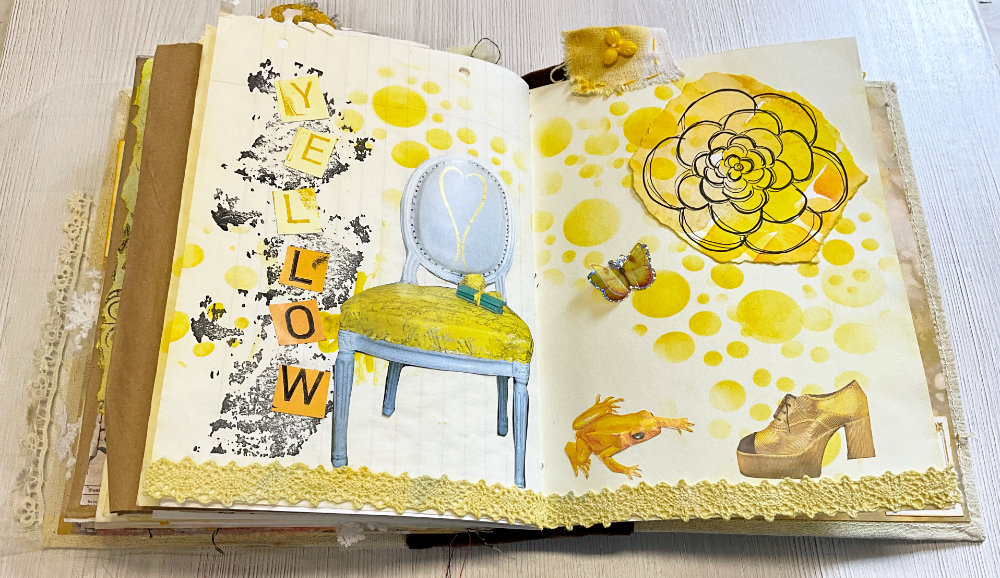
If desired, further decorate the covers. I built a cluster of sorts, with an image and word (hug) from the designer paper, a feather, and cheese cloth. I also added a strip of the designer paper to cover the spin.
The related video for this project may be found below
I will be using this journal for my other design team projects, so please stay tuned for more. Until next time Happy Artin Y’all
APG Jamie – Mixed Media artist